27 Beautiful Christmas Hairstyles with Braids for Every Occasion

Braids offer endless styling options for Christmas events. They look festive, hold well through parties, and work on nearly every hair type. This list gives you simple, doable ideas that don’t demand pricey products or salon visits. Each style uses easy steps, small accessories, and affordable tools so you can get a polished holiday look at home. Try a few, mix them up, and match them with your outfits for the season.
- Classic Dutch Braid with Soft Waves
A Dutch braid is a great starting point for holiday styling. It sits neatly on top of the hair and adds detail from the front. Start by taking three small sections at the hairline and pass them under each other. Keep the braid close to the scalp so the shape stands out. Once you reach the back, secure it and blend the ends into soft waves. You can curl the bottom half lightly or leave your natural texture. For a budget-friendly trick, wave your hair using simple braids overnight instead of heat. Add a bit of hairspray to help the braid hold through the night. You can also slide in a tiny clip or ribbon for a seasonal touch. This style works for parties, school events, or family dinners.
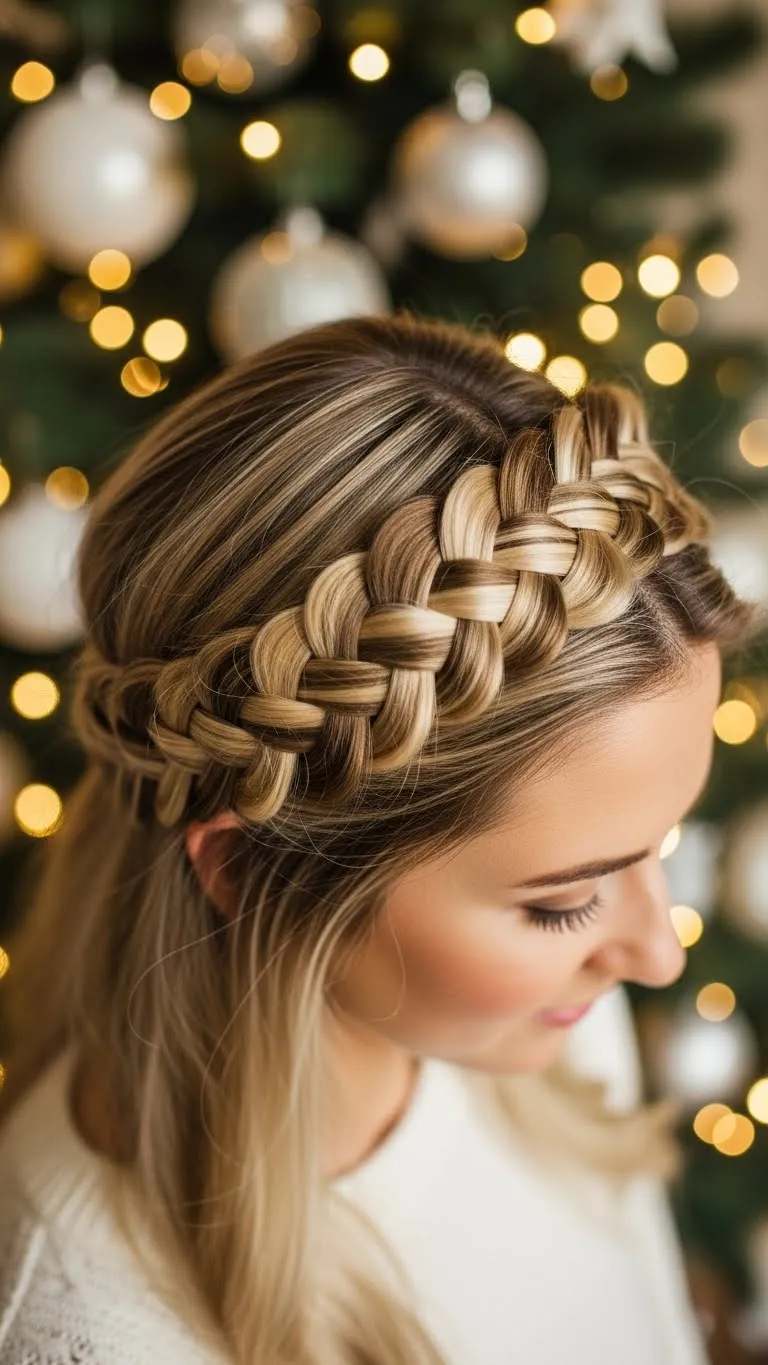
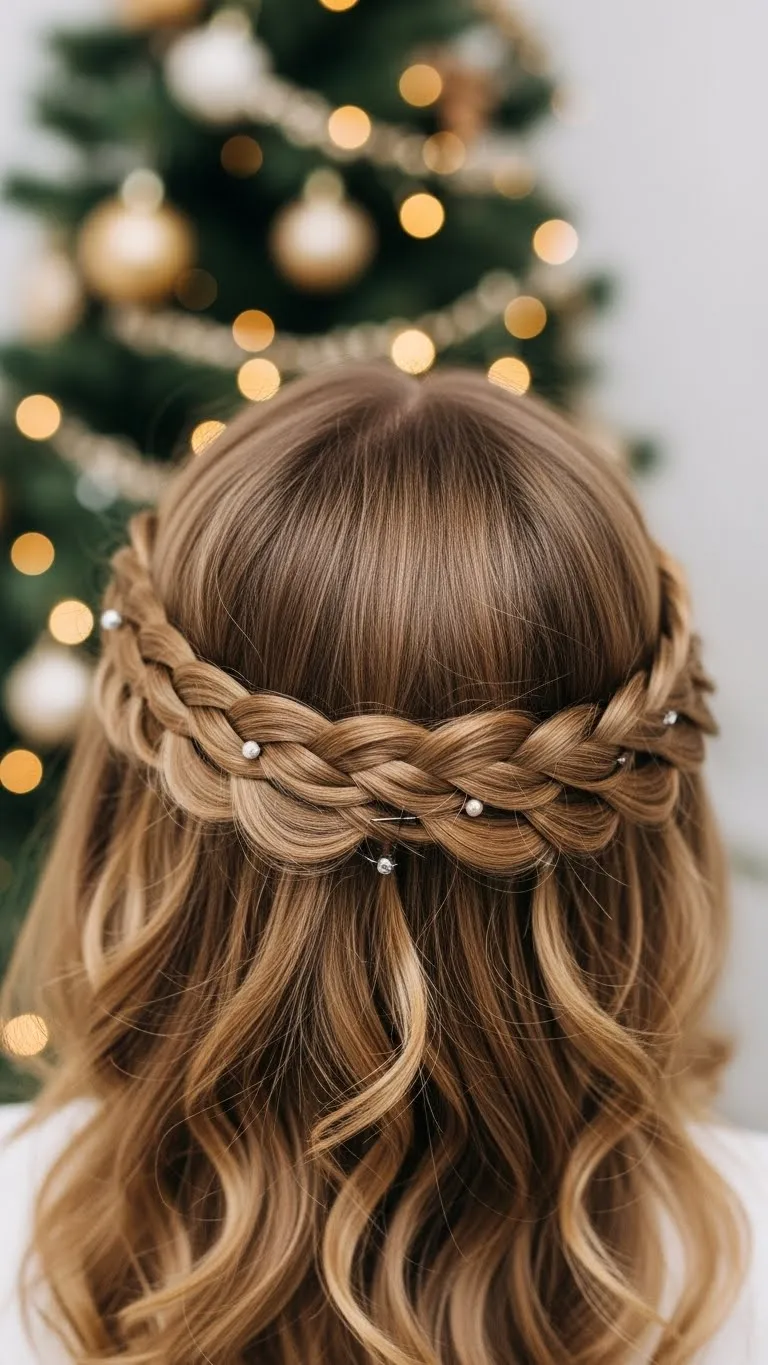
- Half-Up Braided Crown
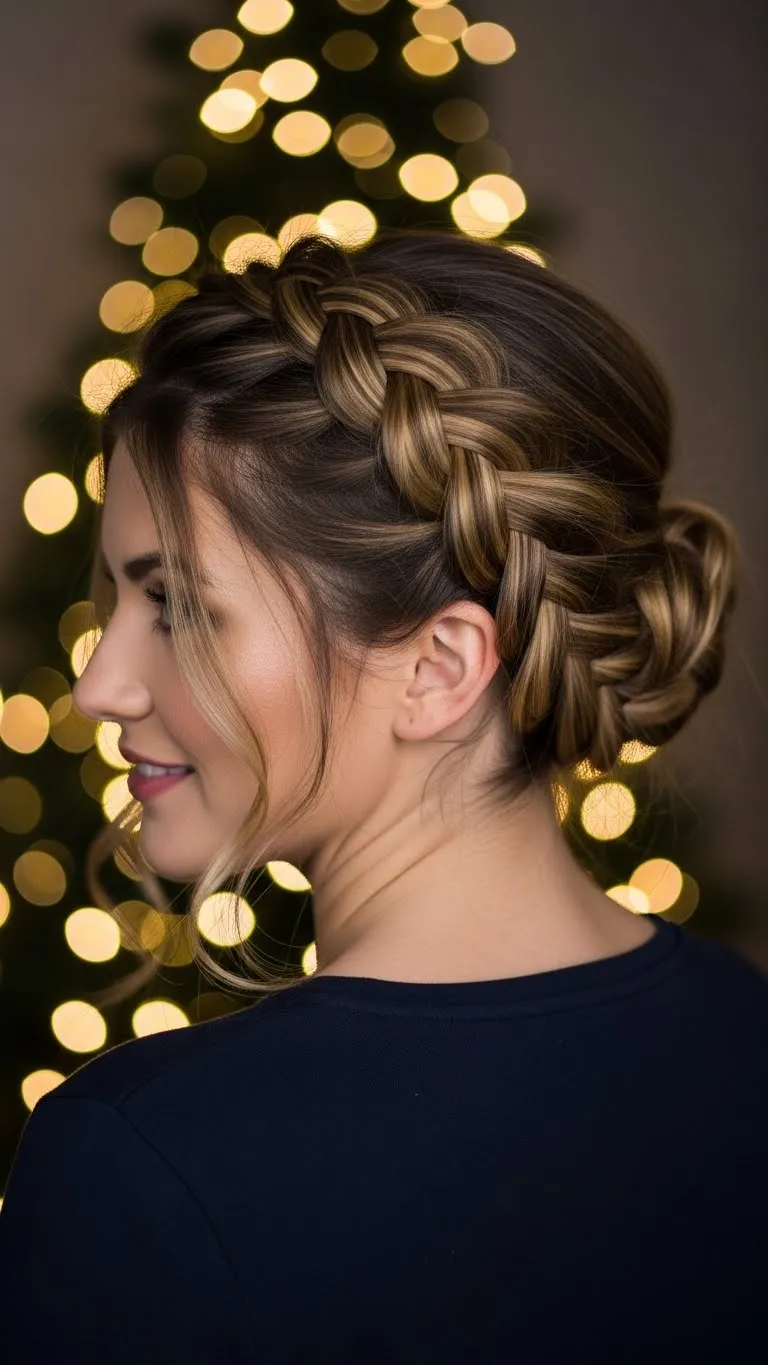
A braided crown gives a sweet holiday feel without being complicated. Take two small sections from the top and braid them toward the back. Tie them together with a small clear band. Let the rest of your hair fall naturally. This look works with curls, waves, or straight hair. For softer texture, apply a tiny bit of mousse before braiding. If you’re on a budget, reuse gift ribbon to tie around the base—it’s cute and festive. A small spritz of hairspray helps hold the shape. It’s quick and ideal when you want something pretty but simple.
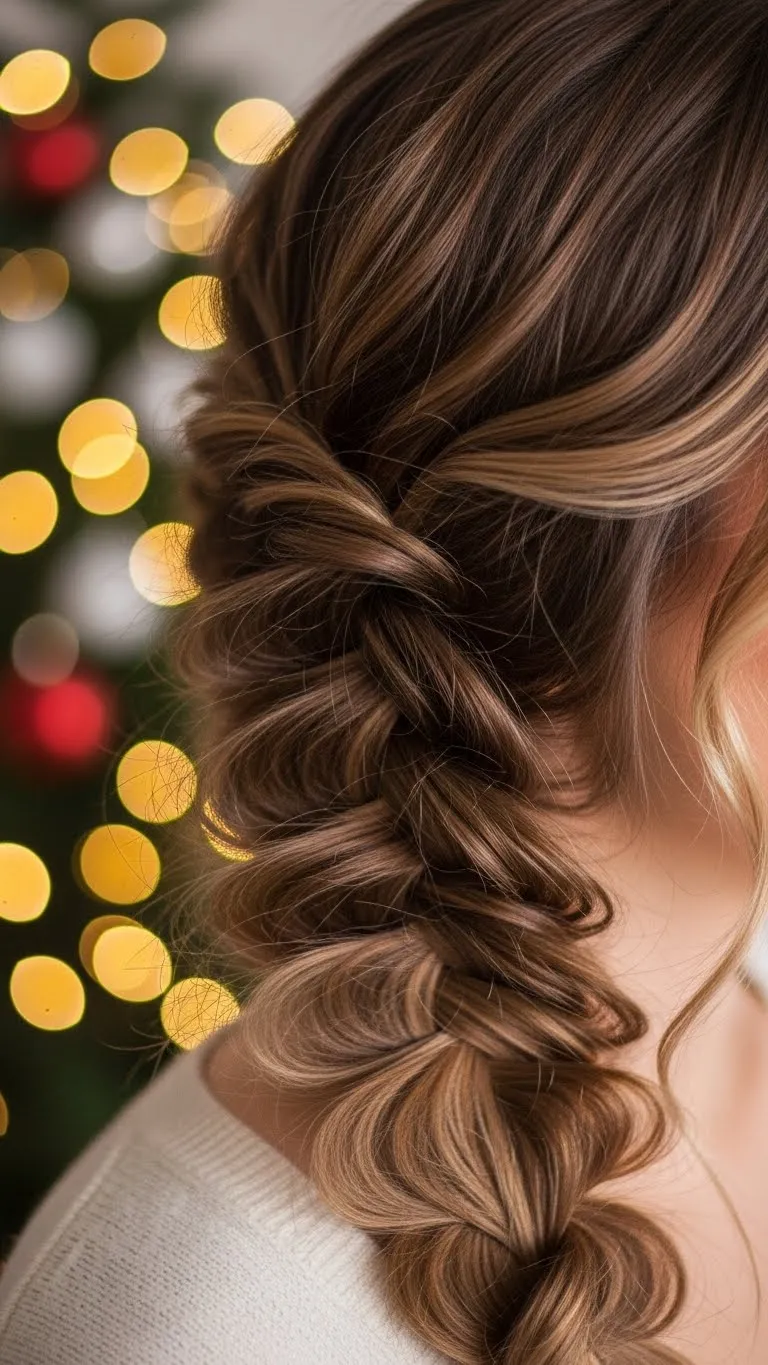
- Side Braid with Loose Curls
A side braid frames the face beautifully. Gather your hair to one side and make a loose three-strand braid. Pull the braid apart slightly for a fuller look. Curl the ends for extra movement. You can skip heat and braid damp hair earlier in the day for natural waves. Add a ribbon or a small bow at the end. This style stays comfortable and looks great from all angles. Perfect for busy party days.
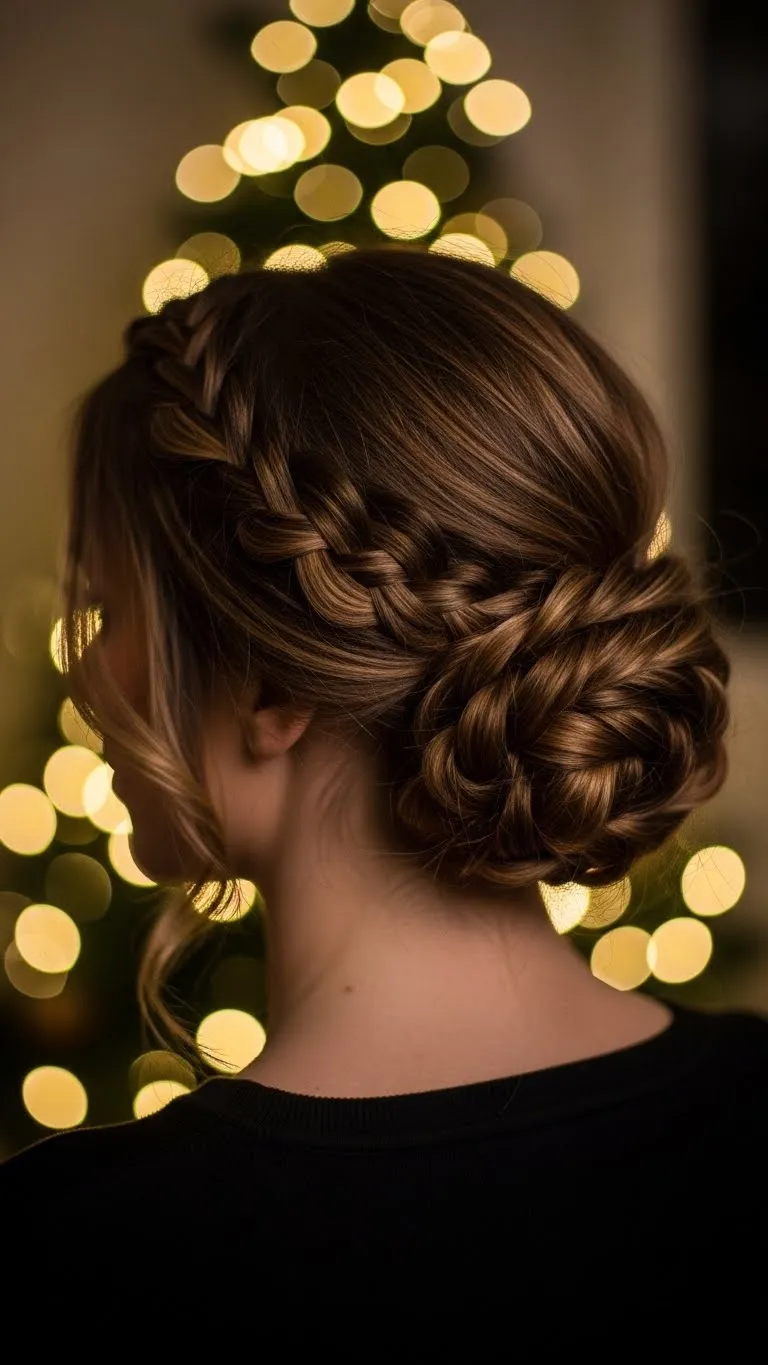
- French Braid into Low Bun
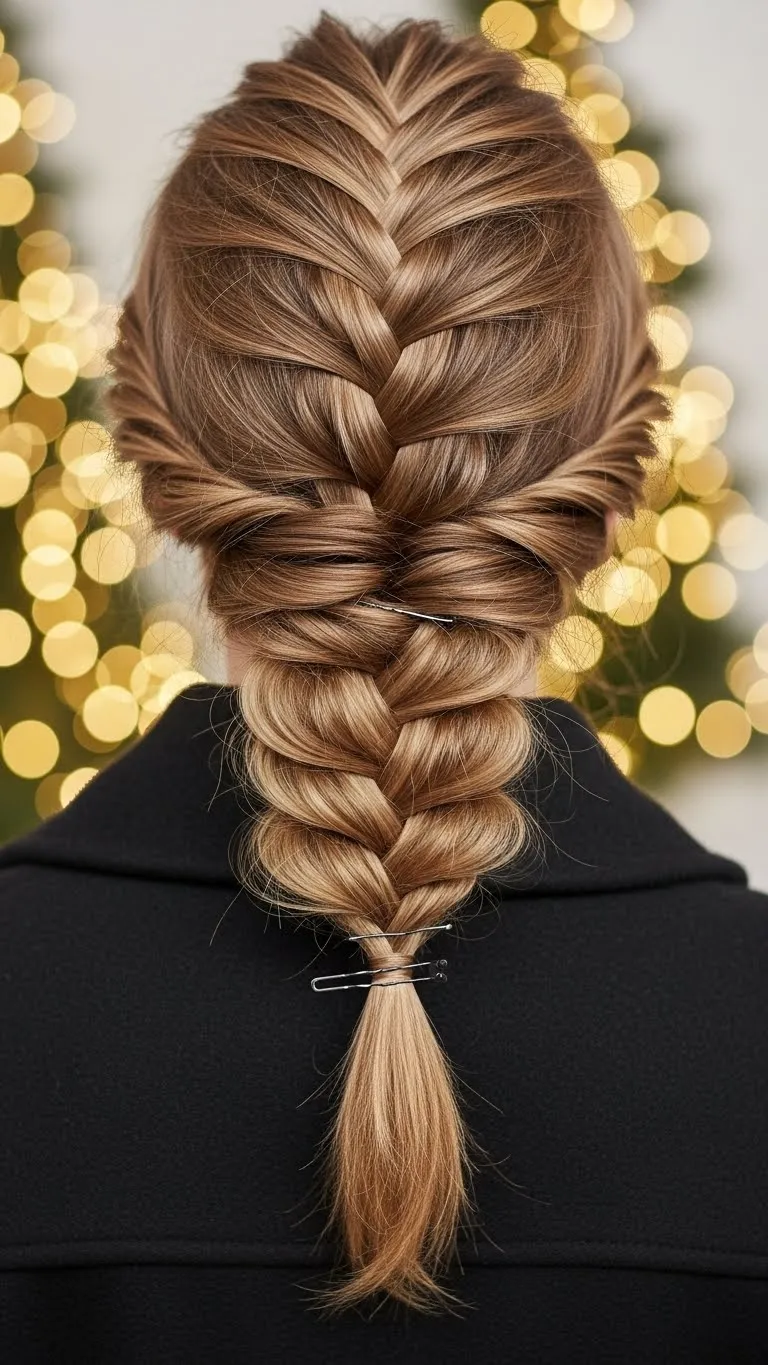
Start a French braid at the top and guide it down the back of your head. Once you reach the nape, twist the remaining hair into a low bun. Secure with pins. Keep it slightly loose for a soft look. A spritz of dry shampoo adds grip to the braid. This style holds well through long evenings. It’s great when you want something polished but still relaxed. Use affordable bobby pins—no special tools required.
- Braided Ponytail Wrap
A braided wrap transforms a simple ponytail. Start by tying a mid or high ponytail. Take a small section from underneath, braid it, and wrap it around the band. Pin it under the ponytail. Curl or wave the ends if you want extra movement. If you’re avoiding heat, twist your ponytail into a bun for a bit, then release it for natural texture. You can also weave in thin ribbon for color.
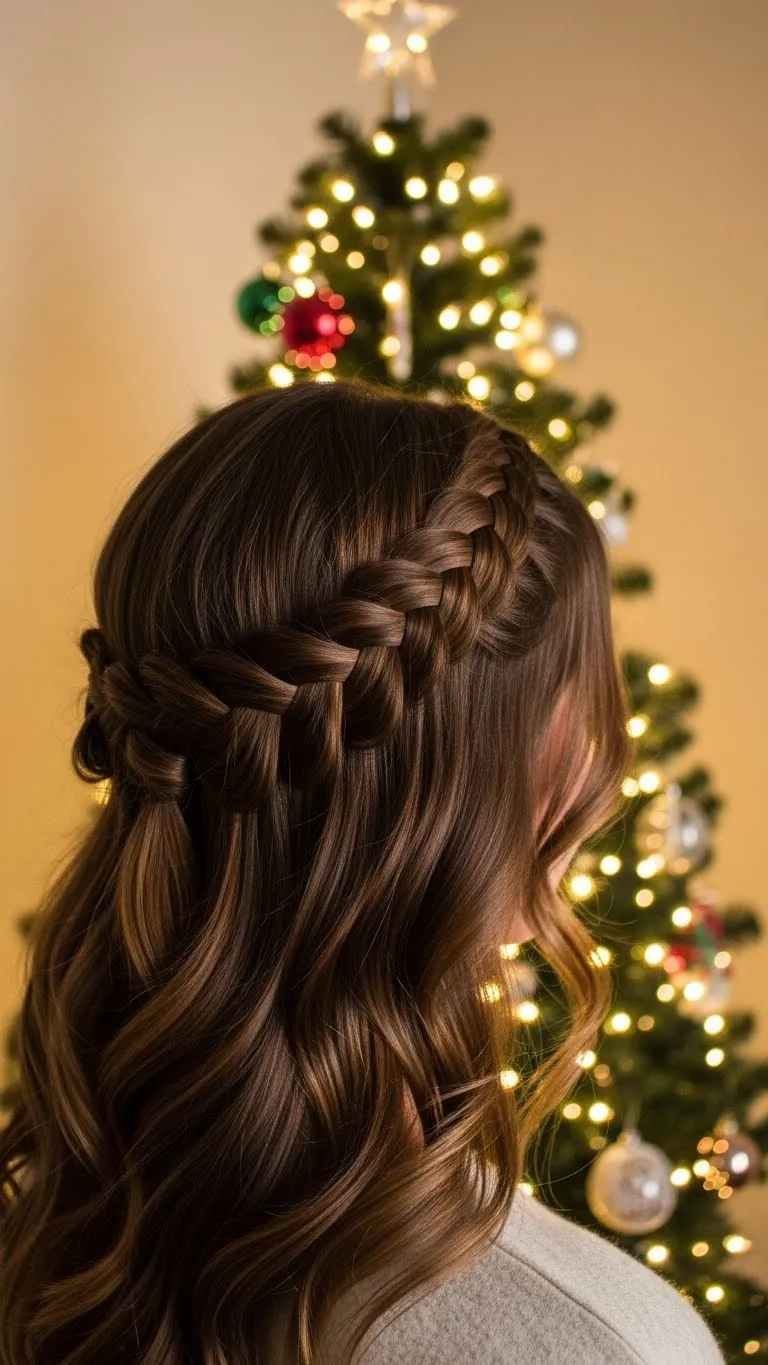
- Waterfall Braid for Holiday Glow
A waterfall braid looks delicate and works well for Christmas gatherings. Begin at the front and braid diagonally. Drop one section each time to create the waterfall effect. Curl the remaining hair lightly or leave it natural. Once you get the hang of it, the braid becomes quick to make. For an easy accessory, stick a few small pearl pins along the braid. They’re inexpensive and add charm.
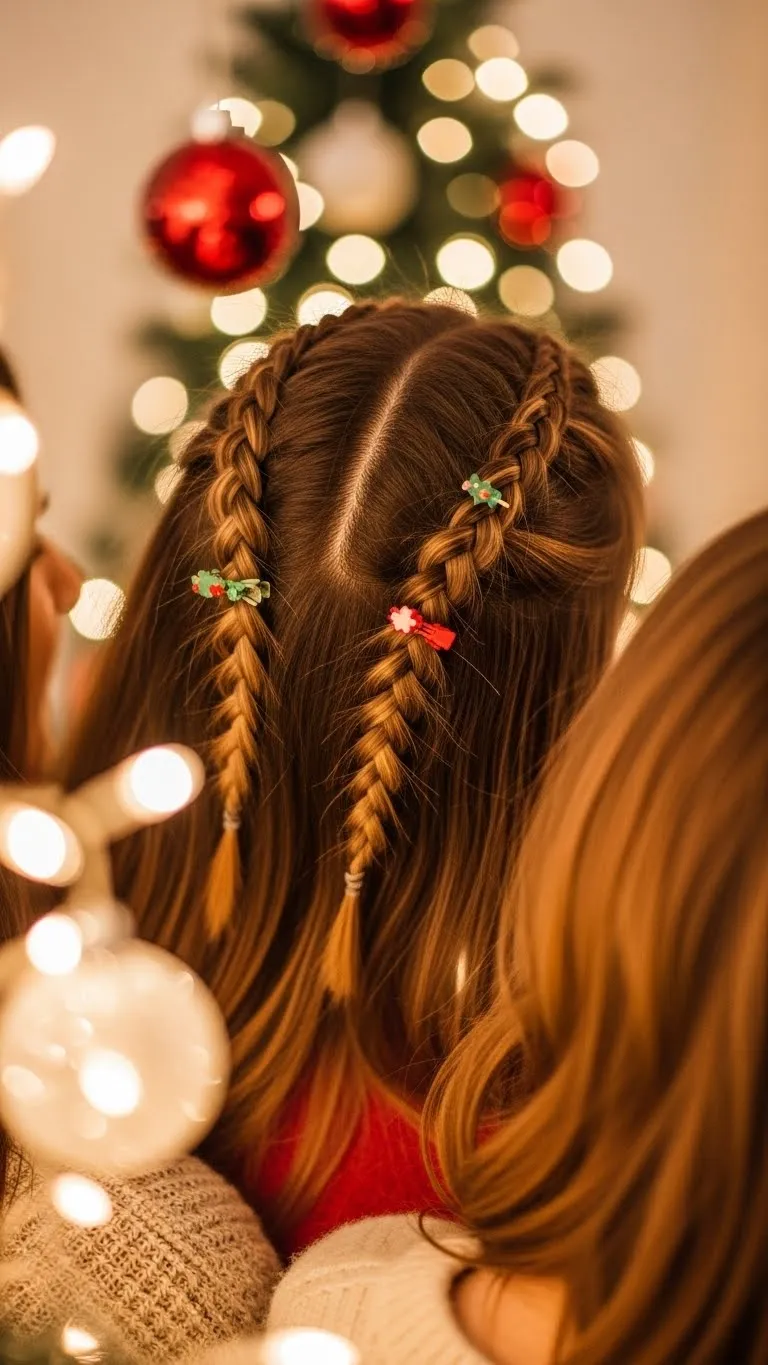
- Double Side Braids
Two small braids add subtle detail. Take thin front sections, braid them, and pin them behind your ears. Leave the rest loose. You can add light curls for softness. This style takes only minutes and uses simple tools. If you want more color, thread in a slim ribbon. This look suits both casual and dressy events.
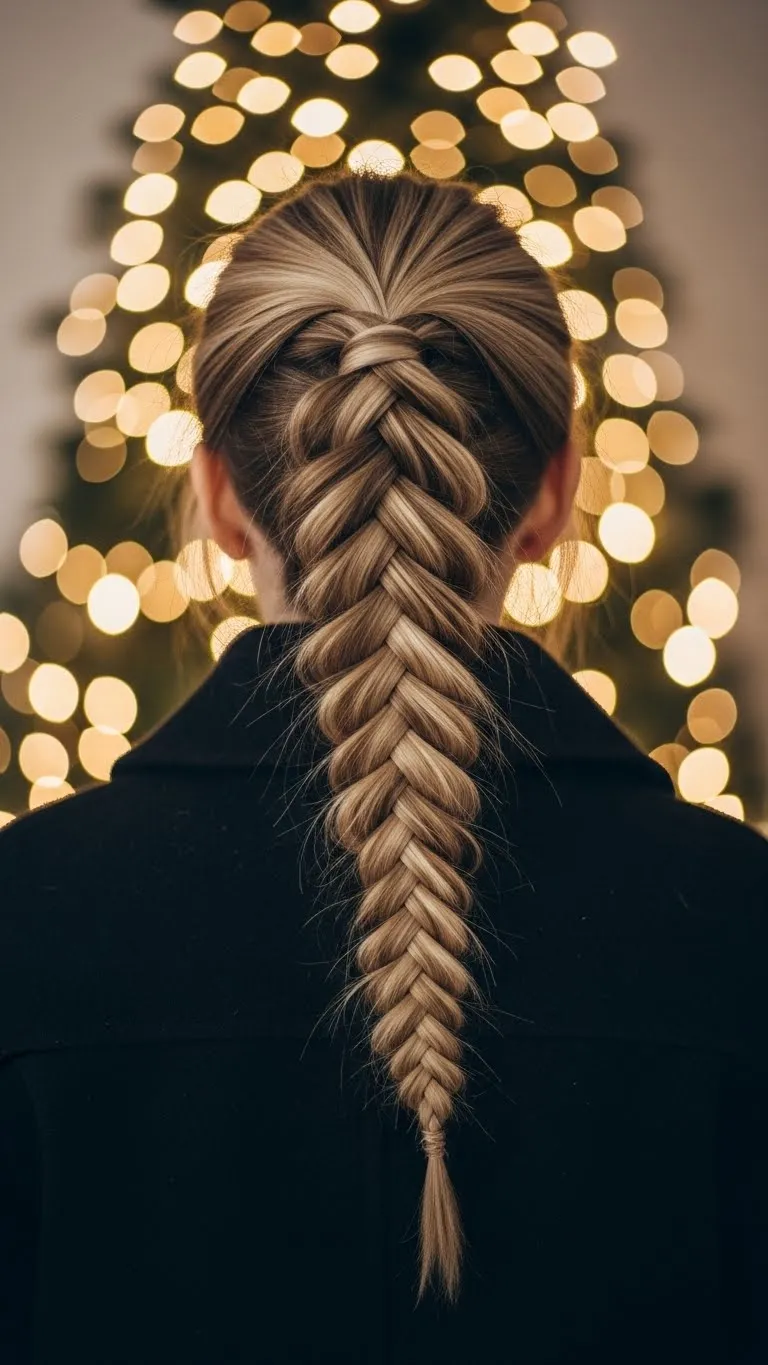
- Fishtail Braid with Ribbon
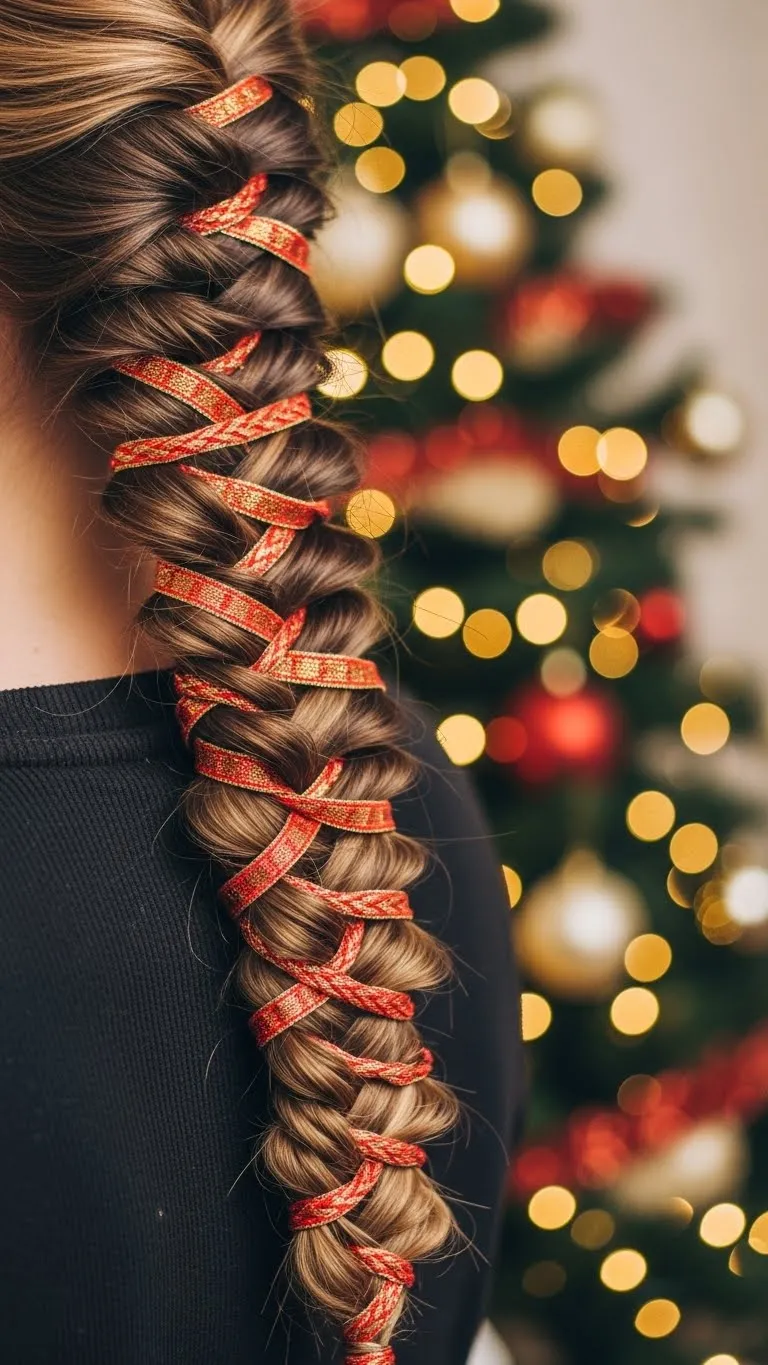
A fishtail braid adds a lovely pattern. Split the hair into two sections and alternate small pieces between them. Keep the braid loose for a softer look. Weave a ribbon through the braid for a holiday theme. You don’t need fancy products—just a small elastic and a bit of hairspray. This style holds well and looks great in photos.
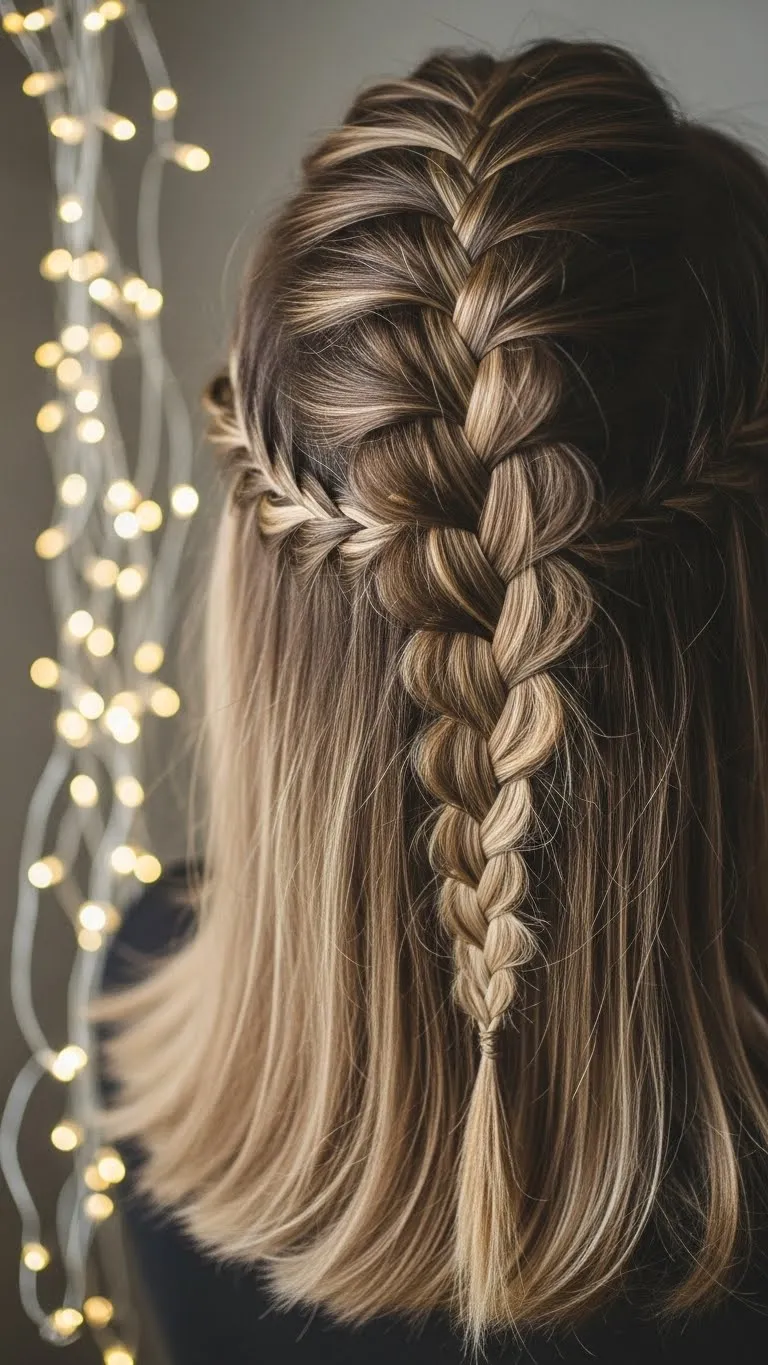
- Side-Swept French Braid
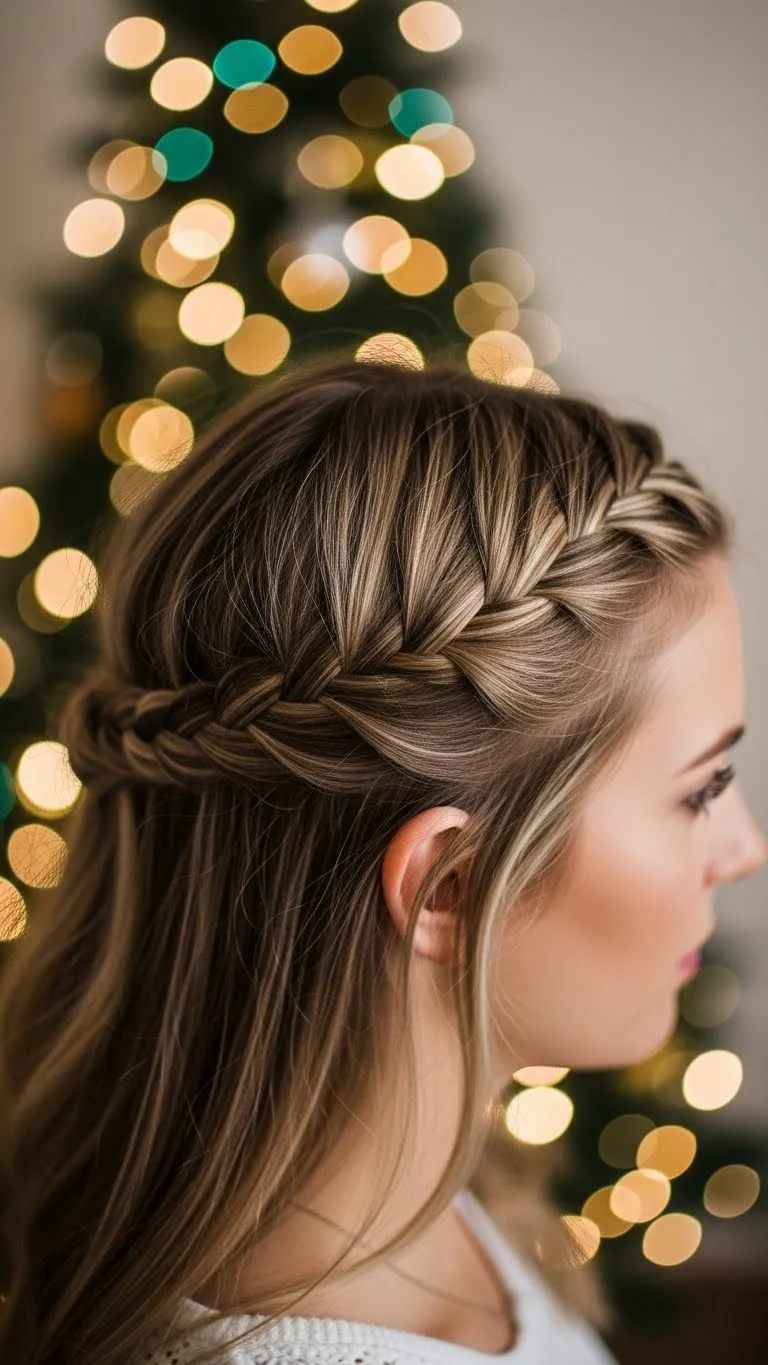
Start your French braid near the temple and move diagonally. Gather hair from the top while moving to the side. Secure it near your ear. Let the rest flow down the shoulder. This shape gives a romantic holiday feel. Heat isn’t required—your natural texture works fine. Add a small metallic clip for shine.
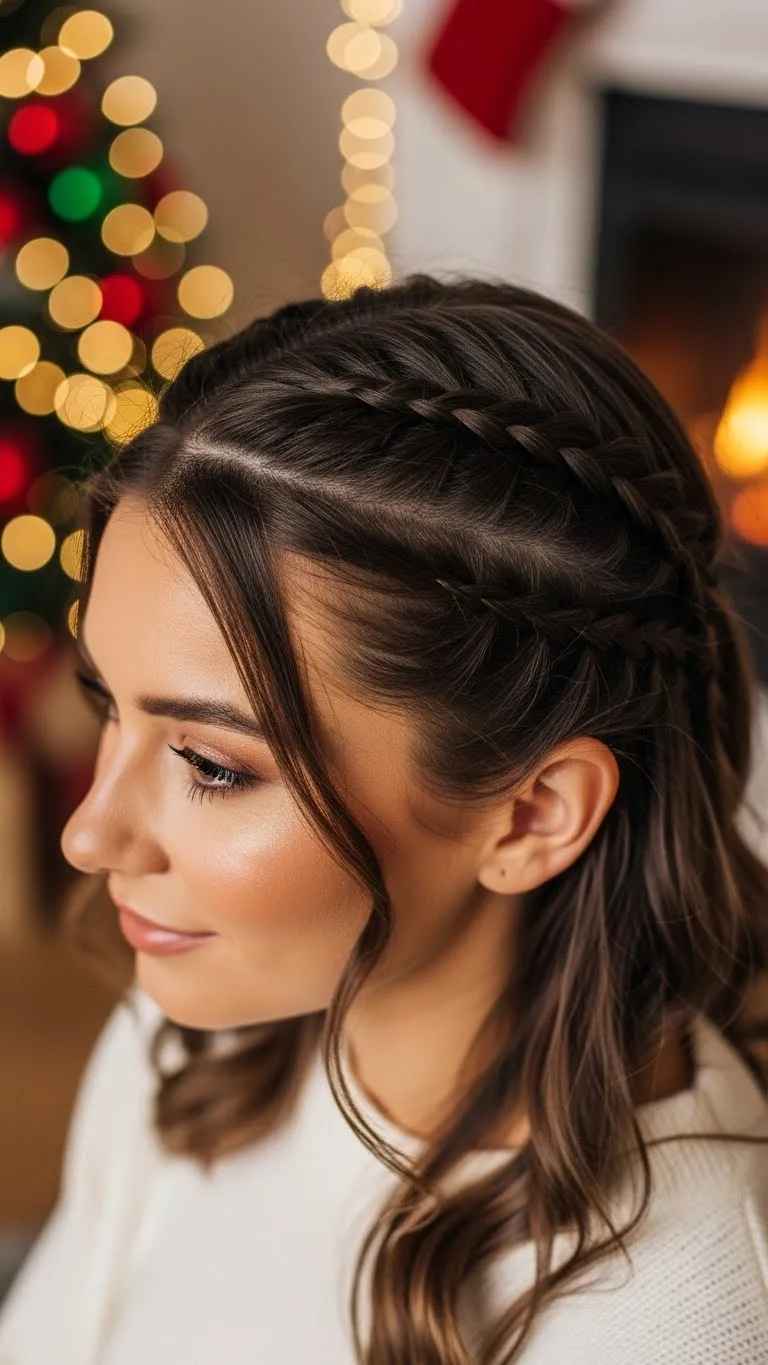
- Braided Headband Look
Take a section behind your ear, braid it, and pull it over your head like a headband. Pin it on the opposite side. Leave the rest loose. You can add curls or keep it straight. This style keeps hair off your face while looking festive. You can also use an inexpensive fake braid headband if your hair isn’t long enough.
- Boho-Inspired Loose Braid
A relaxed braid gives a soft winter feel. Keep the sections loose and gently pull on the braid to widen it. Let a few strands fall around your face. Add small pins or a little ribbon at the end. You can wave your hair using heatless braids earlier. This style suits almost any outfit.
- Half-Up Fishtail
Take two sections from the top and create a fishtail braid. Leave the rest down. Keep the braid slightly messy for charm. If you’re new to fishtails, practice with larger pieces first. You can use inexpensive hair elastics. Add curl or texture spray if you like. Perfect for mid-length or long hair.
- Triple Mini Braids
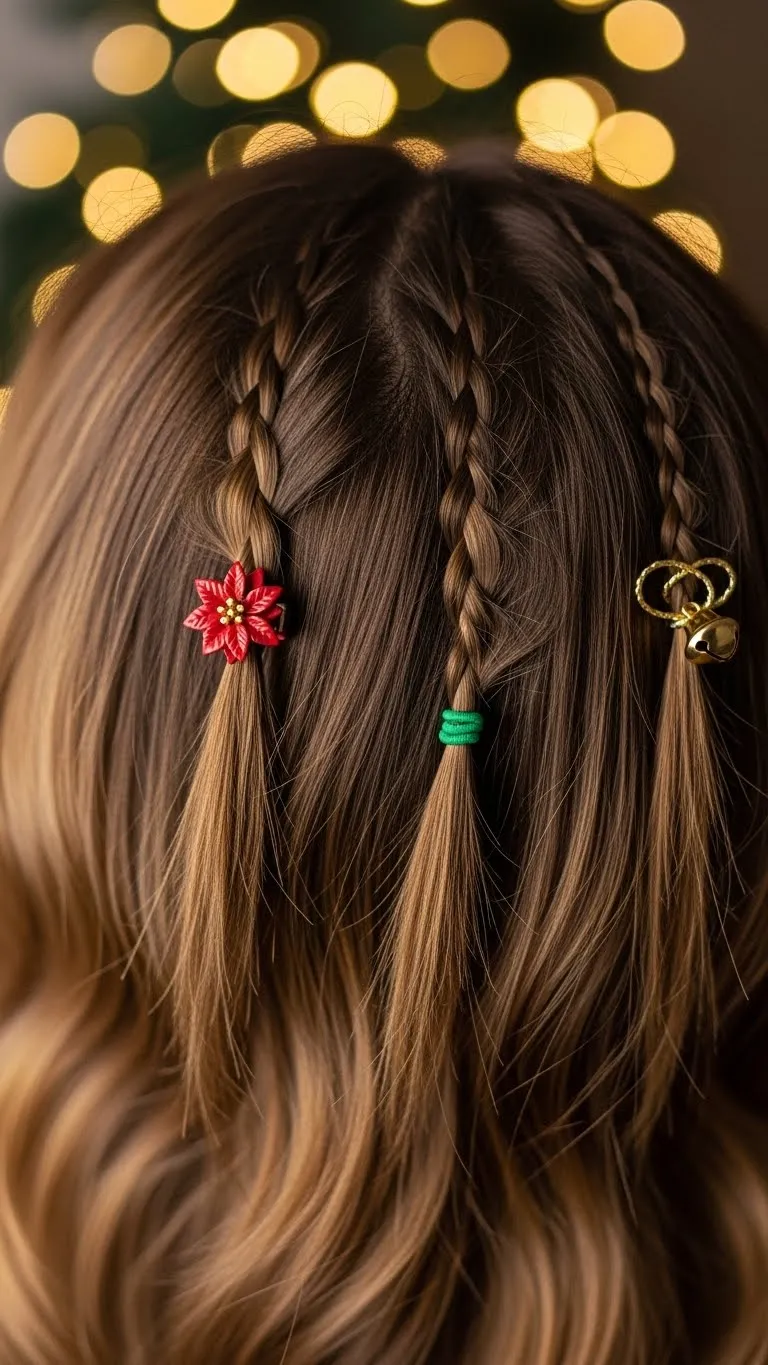
Make three small braids in different spots. Don’t worry about perfect placement. Let the rest fall naturally. This gives a playful holiday look. Add tiny clips or colored rubber bands for interest. It’s an easy, quick option when you want something simple.
- Dutch Braided Pigtails (Holiday Style)
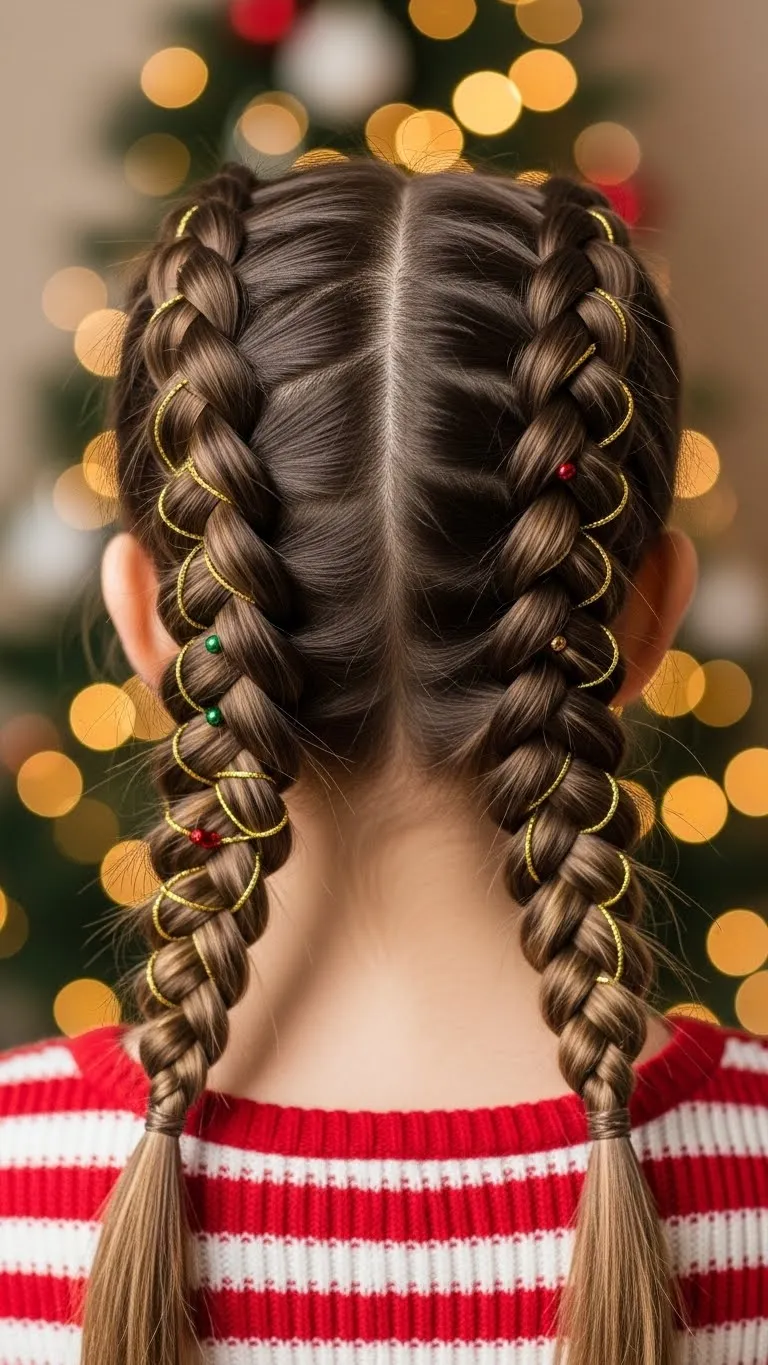
Dutch braids into pigtails offer a cute Christmas feel. Start at the top and braid downward, pulling each section under. Secure at the nape or keep them higher. Add ribbon ties for a festive touch. Great for casual gatherings or family photos. No special tools required.
- Low Pony with Side Braid Accent
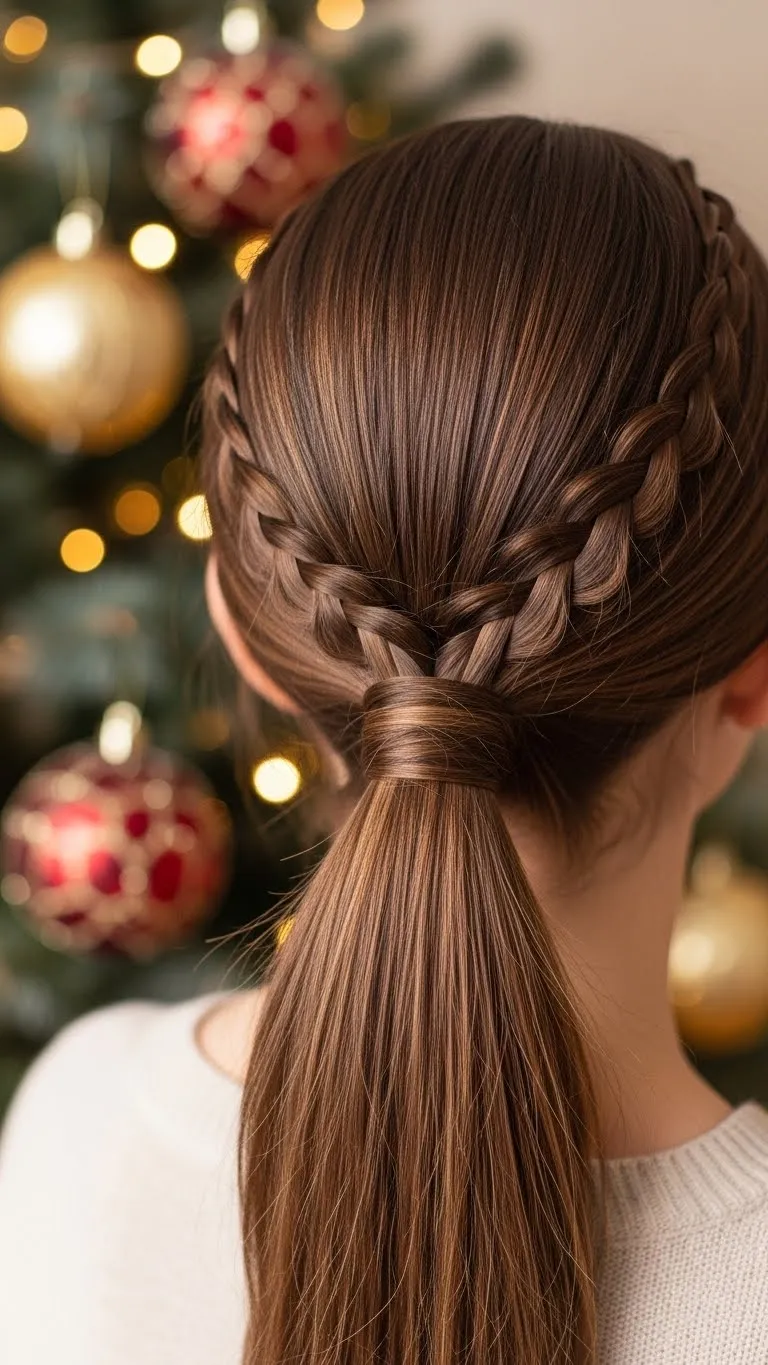
Make a small braid on one side and blend it into a low ponytail. Wrap hair around the band for a clean look. Curl the ends lightly if you want more shape. This style is simple and reliable. A few pearl pins can make it more festive.
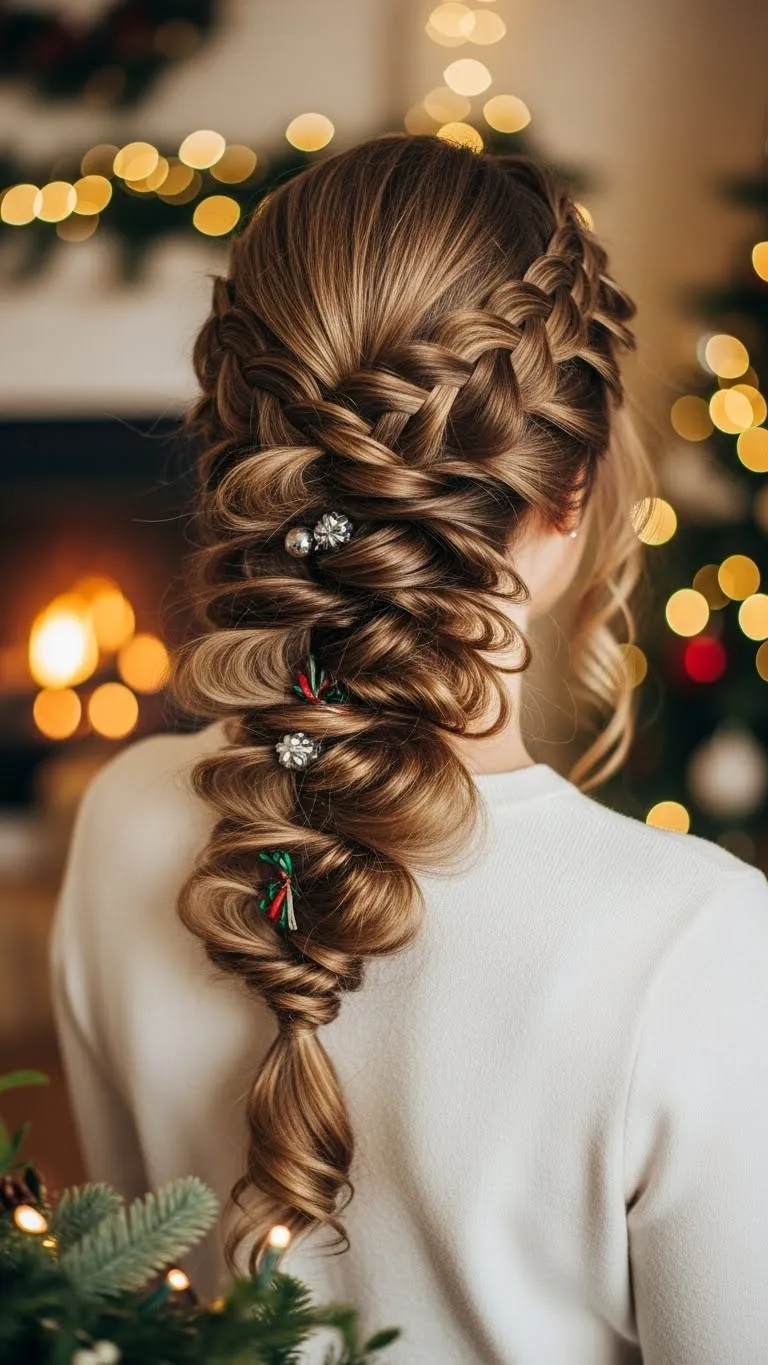
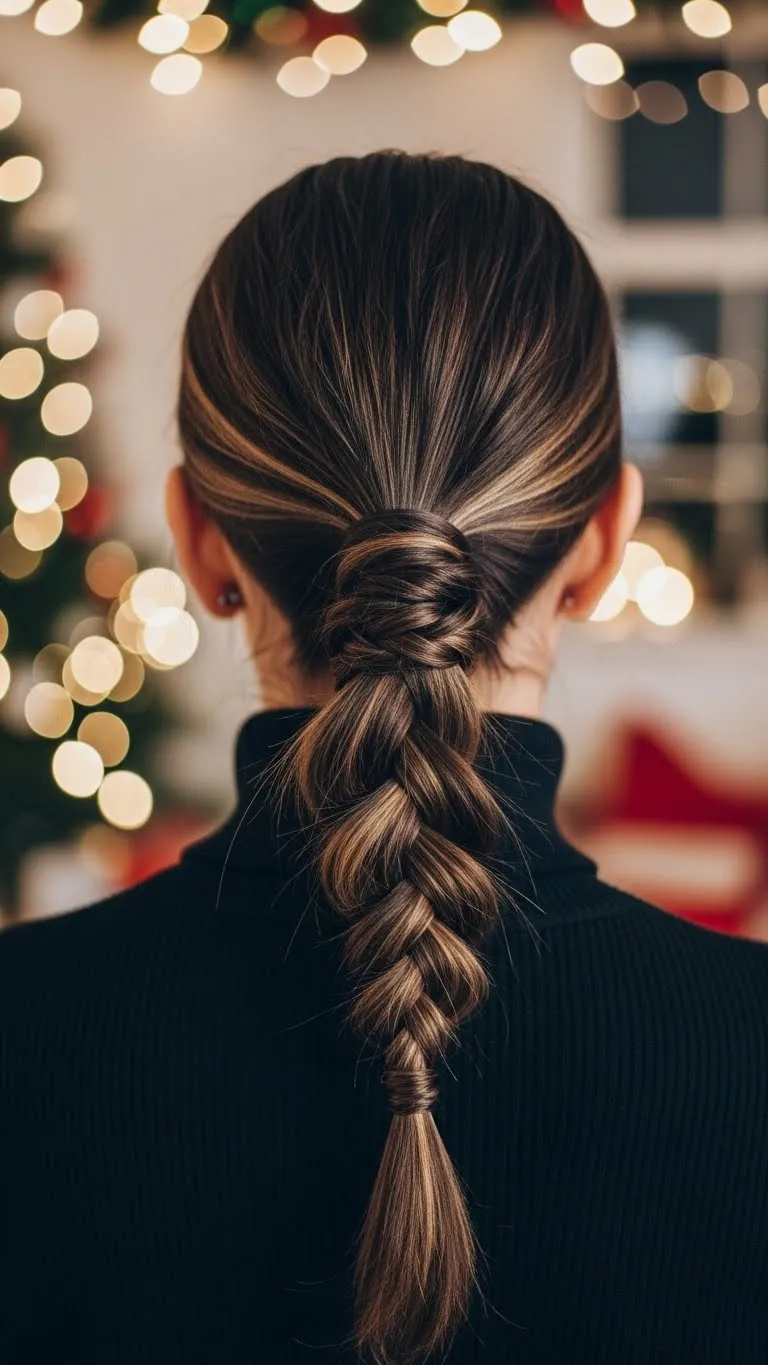
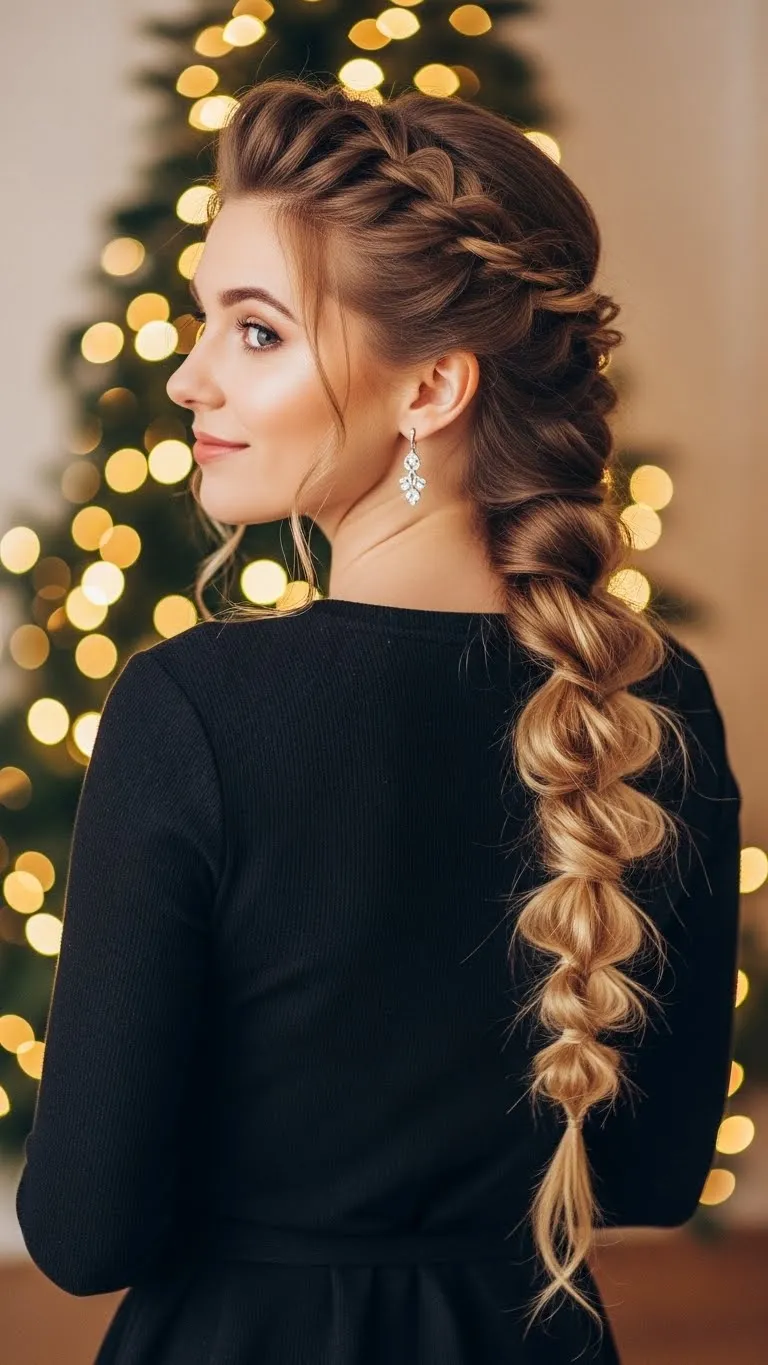
- Thick Holiday Rope Braid
Split your ponytail into two sections and twist them both in the same direction. Then twist them together in the opposite direction. This creates a rope braid. Secure with an elastic. It holds well and looks neat. Add a bow at the end for color. It’s quick and works on most hair types.
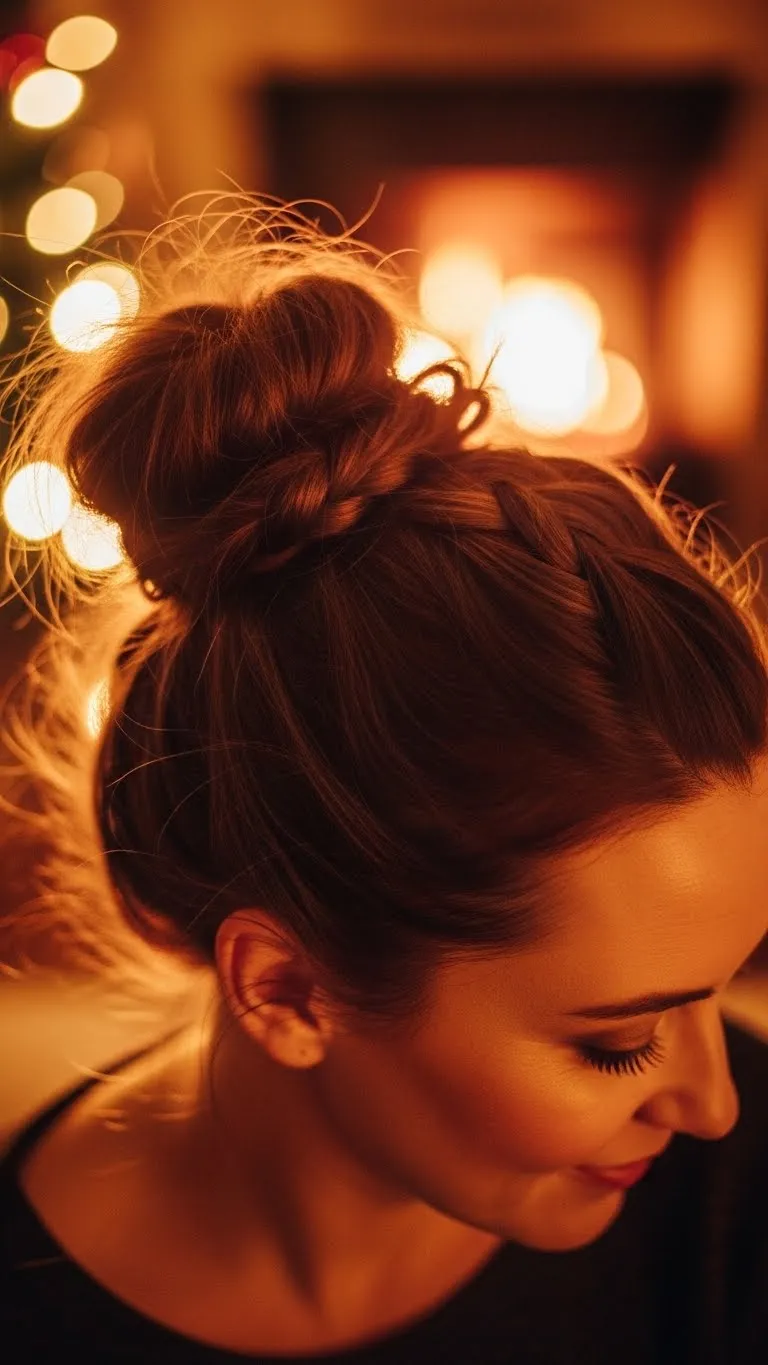
- Braided Bun Wrapped with Twists
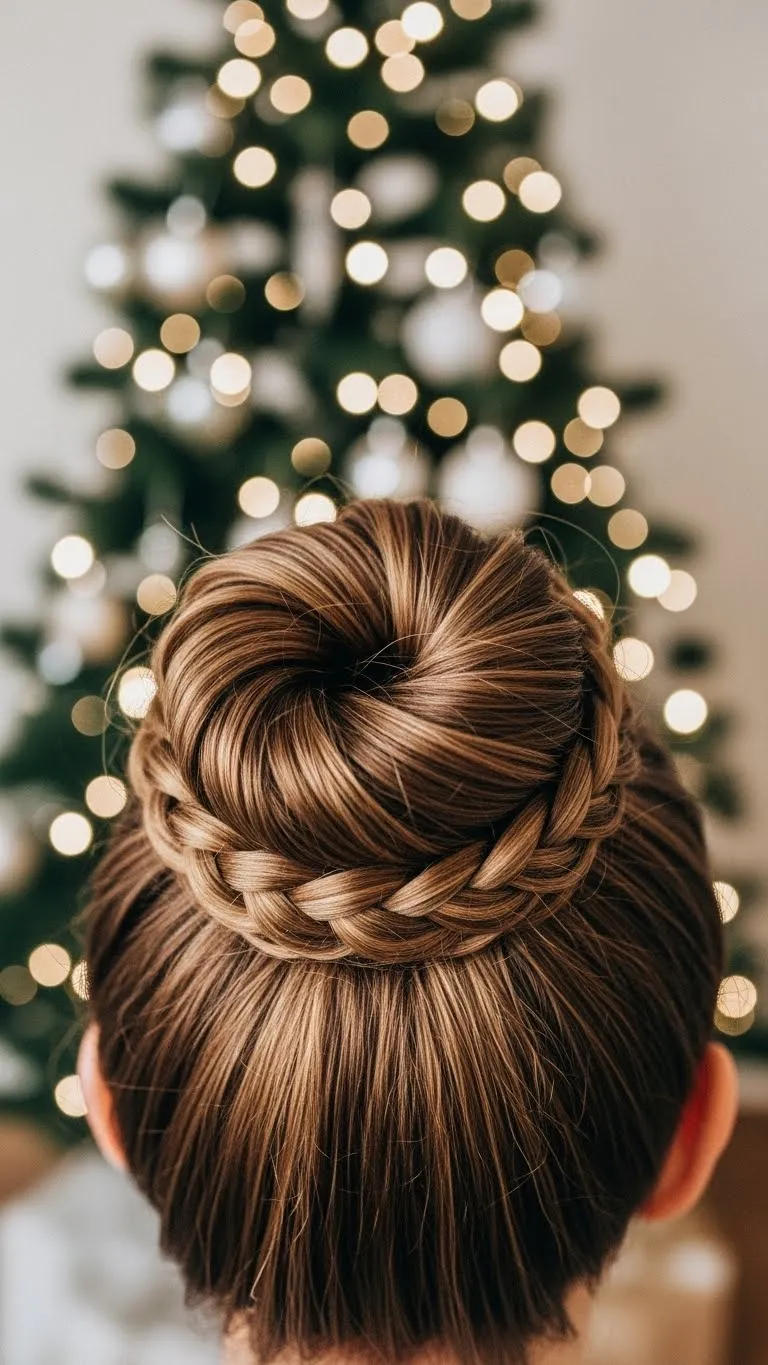
Make a simple bun and braid a small section from the side. Wrap the braid around the bun and pin. Add texture spray for grip. You can decorate the bun with small clips or faux pearls. It’s a nice option for parties and photos.
- Crown Twist Braid
Instead of a full braid, create a twist around the crown. Take two small sections and twist them as you guide them around your head. Pin underneath. This is easy for beginners. Add light curls to the rest. You can tuck in small beads if you want sparkle.
- French Braid into High Ponytail
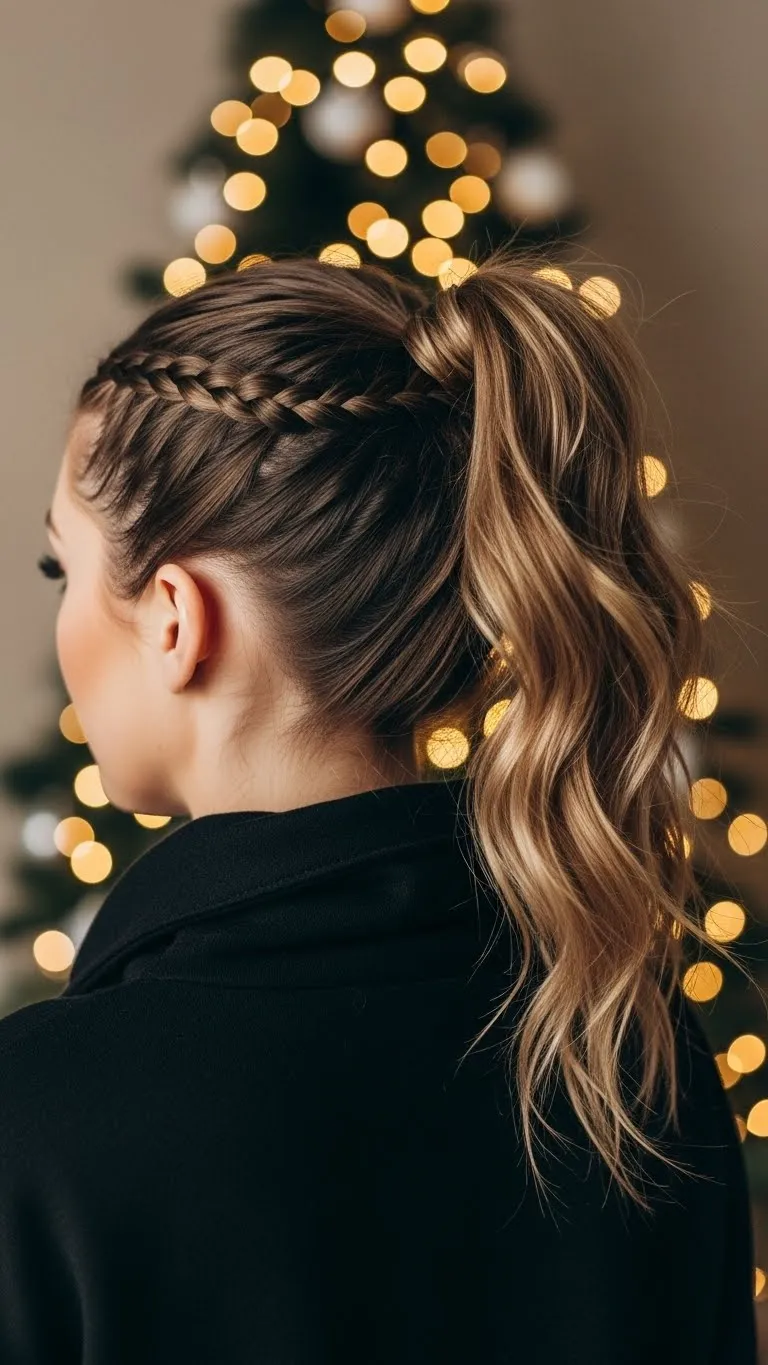
Start a French braid at the top and stop at the crown. Tie the rest into a high ponytail. Add waves or curls to the ponytail. This gives a sporty but festive look. A satin ribbon makes it even prettier. Affordable, quick, and party-ready.
- Side Rope Braid

Make a rope braid over your shoulder. Keep it loose for a softer look. Add a bit of oil for shine. This is one of the easiest braids, perfect for quick styling. Add a small bow at the end for a holiday touch.
- Messy Braided Bun
Make a loose braid and twist it into a bun. Pin lightly so the shape stays soft. Leave a few strands loose. Use leftover gift ribbon as a tie if you want color. This is great when you’re short on time but still want something pretty.
- Braided Sides into Half-Up Pony
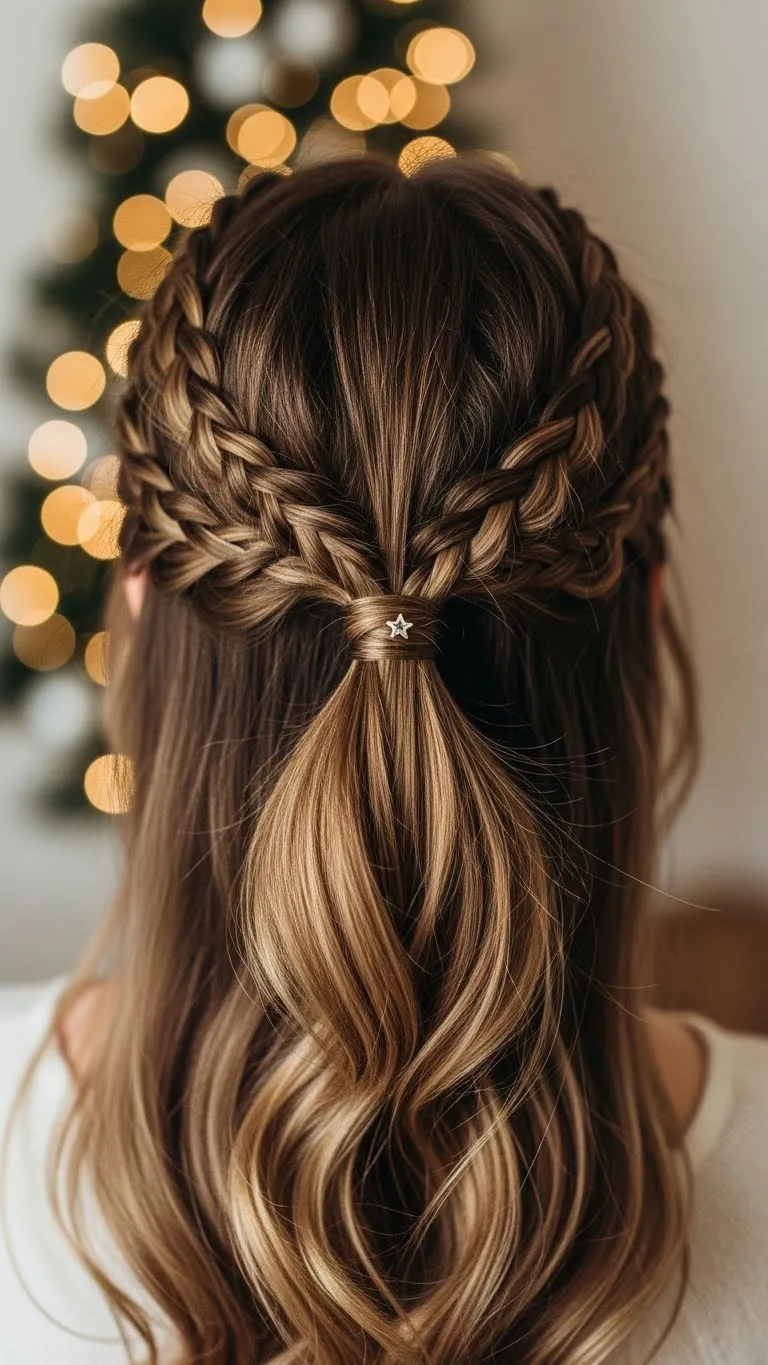
Braid both sides and tie them into a half-up ponytail. Let the rest fall naturally. Curl or wave the lower section if you like. This style suits most hair textures and works well with simple accessories. A tiny clip adds charm without cost.
- Folded Braid Updo
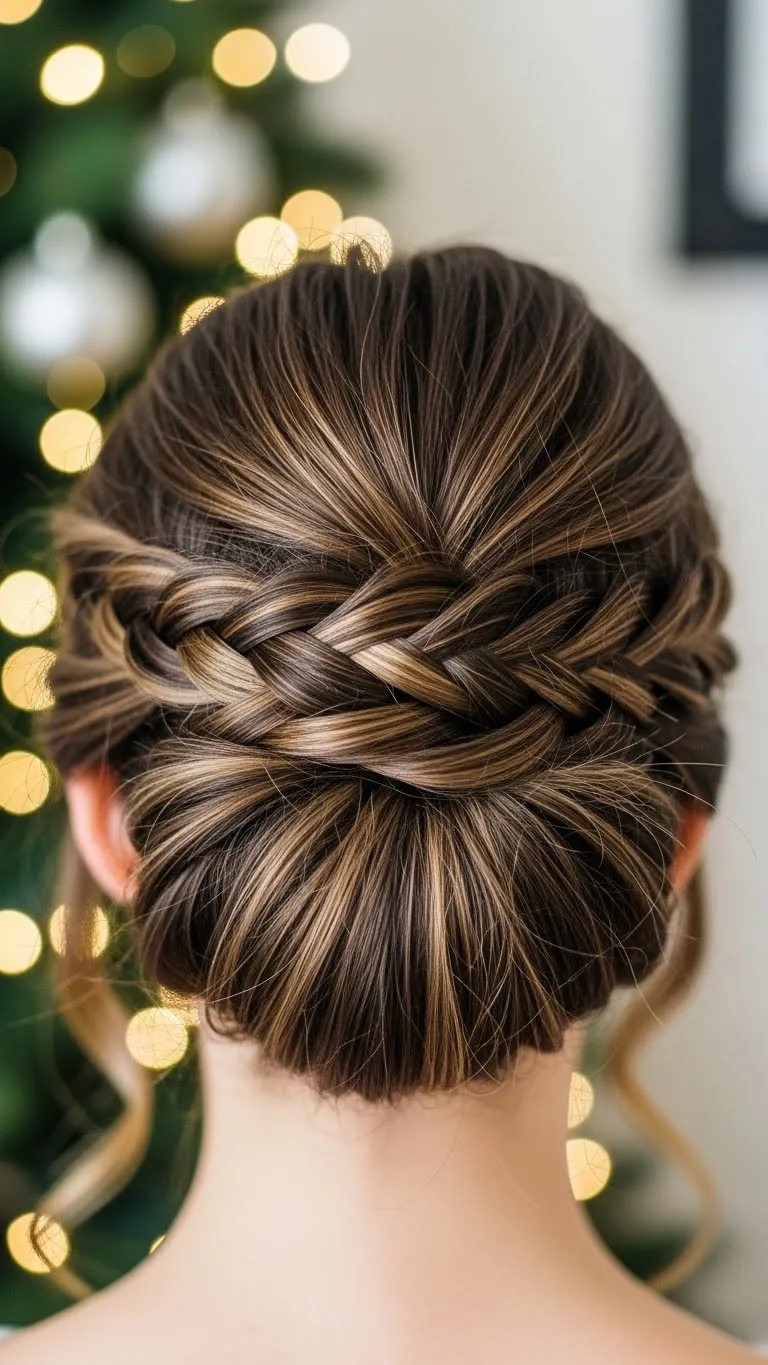
Make a basic braid, fold it upward, and pin it flat against your head. This creates a neat updo that looks more detailed than it is. Add a small bow or pearl clip. It stays secure and works for dressy events.
- Double Dutch Half-Up Style

Create two Dutch braids from the front and tie them together at the back. Keep the rest loose. Add waves for movement. A small ribbon or clip finishes the look. This style holds well and looks festive.
- Loose Braid with Twisted Front Pieces
Twist the front pieces and pin them back. Then braid the rest lightly. Pull the braid apart for softness. Add small ornaments or pearl pins for interest. This look works on most hair lengths and feels comfortable for long events.
- Braided Low Side Bun
Start a loose braid and bring it to the side. Coil it into a bun and pin it. Let a few strands fall free. Add mild hairspray for hold. You can place a tiny festive clip near the bun for sparkle. Easy, cute, and party-ready.
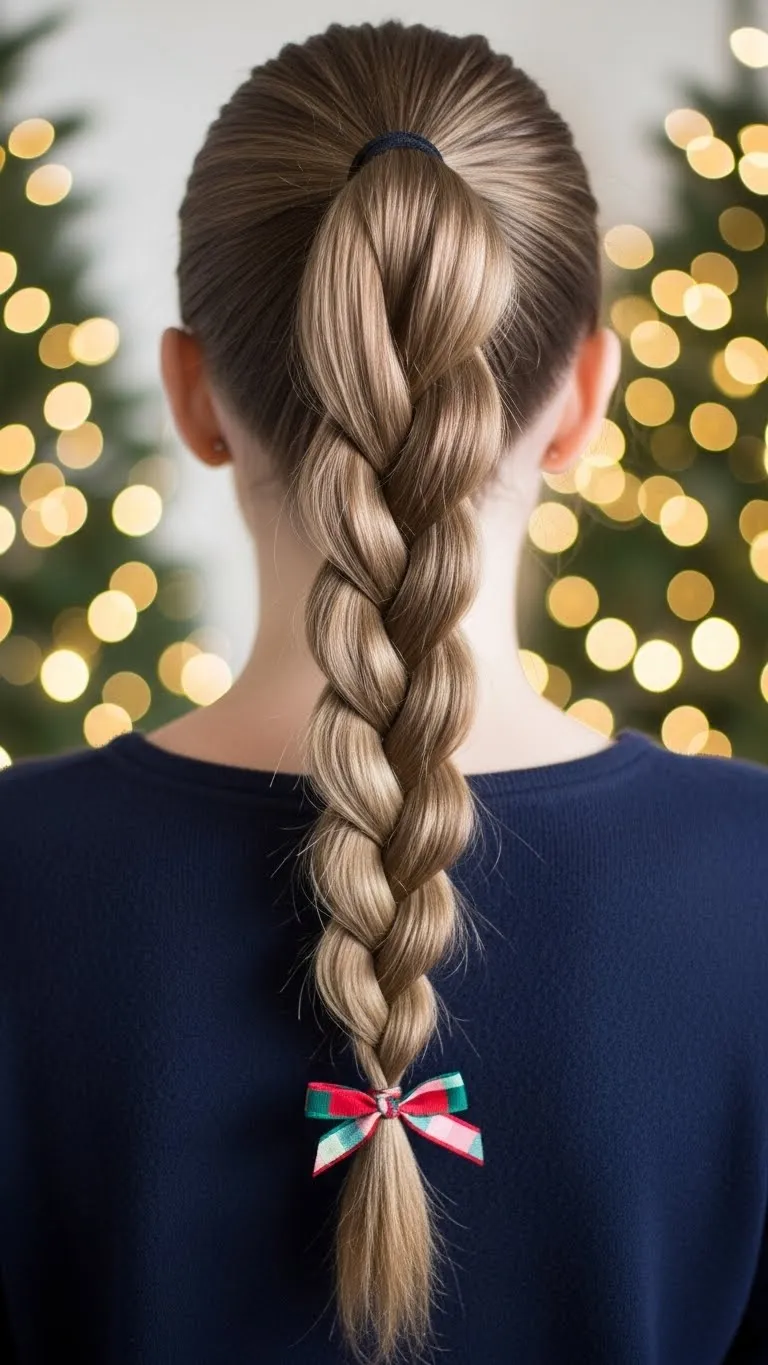
- Full-Length Three-Strand Braid with Soft Face Pieces
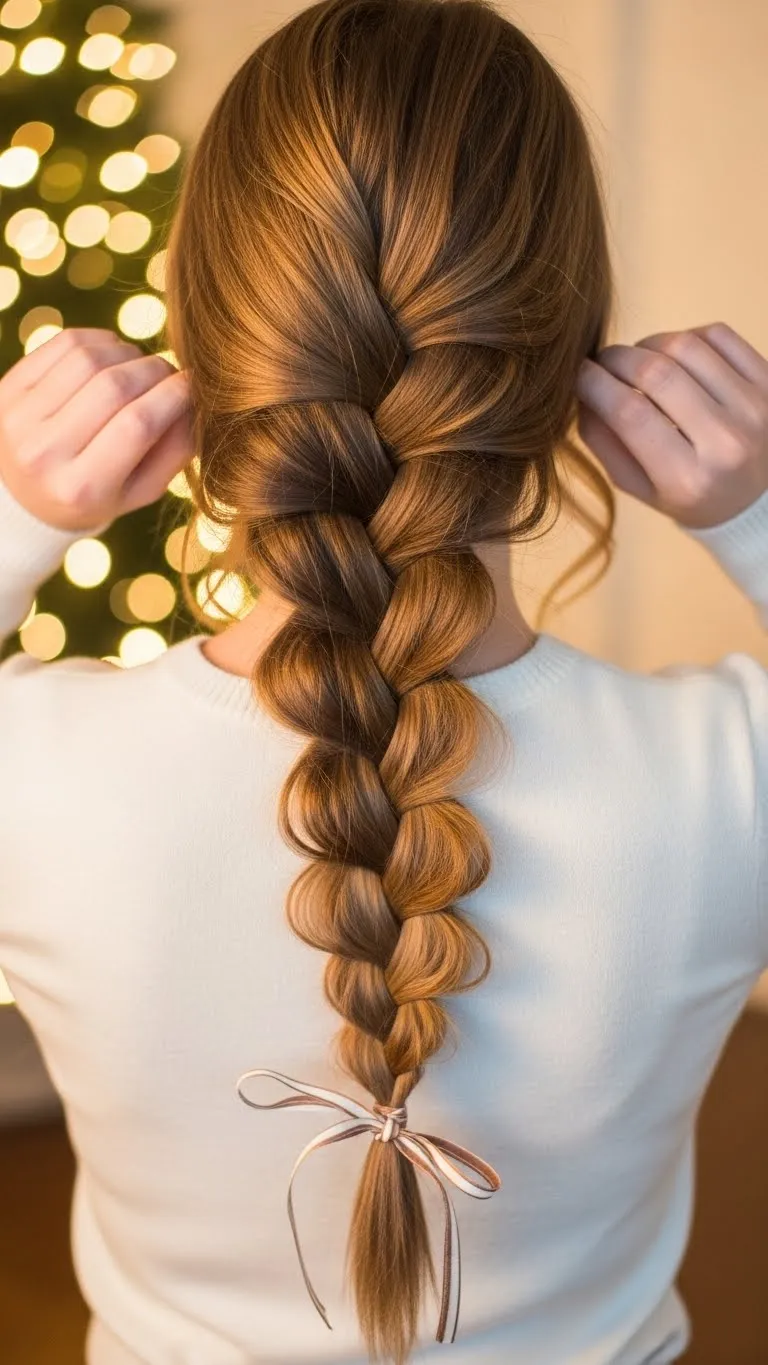
Keep the braid loose so it looks relaxed and full. Pull out soft face pieces. You can curl the front pieces lightly. Use a basic elastic and tie a ribbon at the end. This style works well when you want something quick but pretty. No complicated steps, just simple braiding.
Conclusion
Braided hairstyles make Christmas styling fun, easy, and affordable. You can create charming looks using simple tools, small accessories, and basic techniques. Try a few styles at home, pair them with your outfits, and enjoy a festive look that feels comfortable and suits any holiday event.